MotoDuvall

repair, restore, outfit

  • About Us
  • Contact Us

FOR SALE: 2006 KTM 960 Adventure- $5000

September 13, 2020 by Jim Harriger

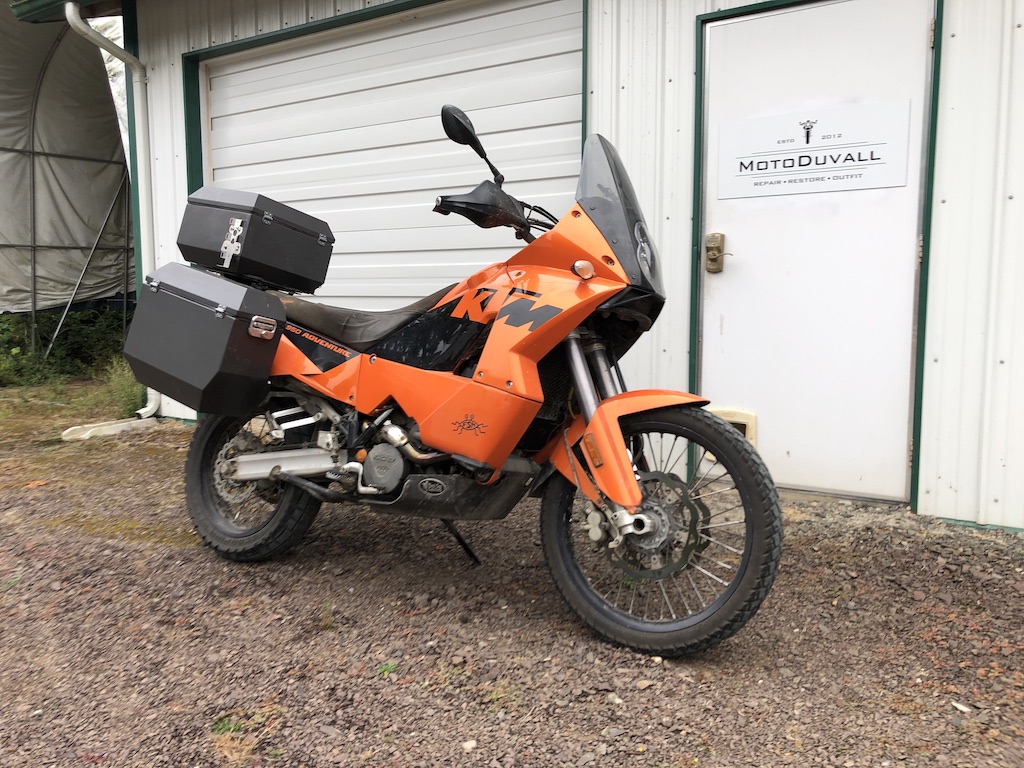
I’m putting my 950 adventure up to sale, great bike, runs and handles great. Wear and tear on my knees has me moving to a lighter bike for adventure riding. 36K miles. Bike is great mechanically, meticulously maintained. Cosmetically OK, the biggest flaw is the bubbling decals, which I’ve just never bothered to fix, one of the panniers has some dents and scratches, and the saddle is somewhat faded.

many extras: 

Al Jesse panniers and top box (with fuel bottle carriers)

 LED taillight/turn signals

Galfer wave rotors and pads front and rear

euro headlight with HID low beam and LED high beam

euro headlight switch

rally switch (fingertip control of odometer modes)

FMF Q4 slip-ons

facet fuel pump

head2wind jet kit and prefilter

second fan and low-temp thermo-switch (never goes above 4 bars on guage)

remote idle mixture screws

renazco saddle

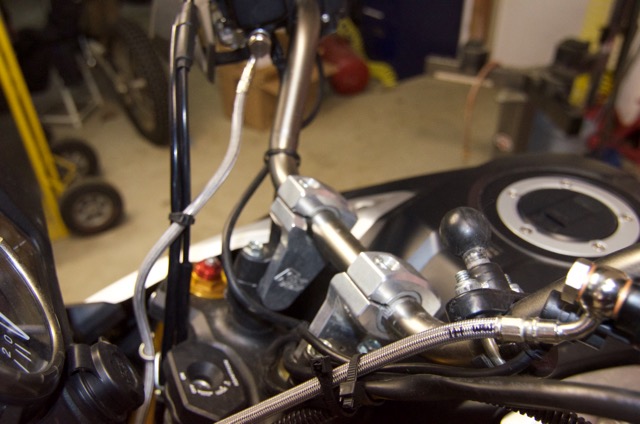
touratech GPS crossbar

touratech mirrors

heated grips

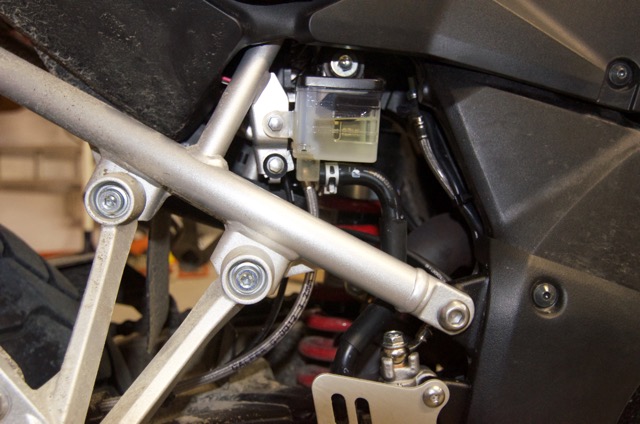
built-in heatrollers for grips and vest connection next to shock adjuster

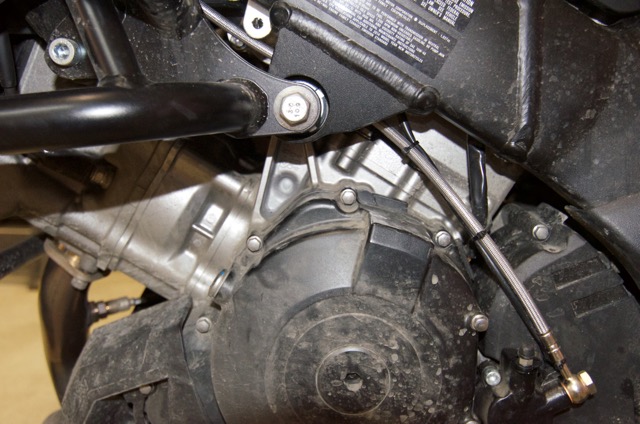
aftermarket clutch slave cylinder

Black Dog Cycle Works skid plate

LiFe battery, with tender pigtail brought out under the seat. 

LED driving lights, with 3-way controller (not mounted right now- they we’re on the crash bars, which got bent in, wait for it, a crash)

Extra parts available with the bike: original headlight and seat. extra sprockets (1 rear, two front), TKC 80 tires with about 1300 miles on them, original seat, KTM touring windscreen, Clearview windscreen and deflectors, original mirrors, 2 engine oil filters.

Full service 1600 miles ago: valve check, prefilter clean, oil change w/filter.  Rear shock and forks rebuilt 2000 miles ago by Barry Wressel at KFG, in Kent, Washington.

Bike is located in Duvall, WA (30 miles east of Seattle). Test rides with motorcycle endorsement and $5000 in my hand.

Filed Under: Uncategorized

SOLD:FOR SALE: 1986 BMW R80RT

May 3, 2020 by Jim Harriger

This bike is one I rescued from a friend’s back patio. Repaired the bent front wheel, cleaned the tank, rebuilt the carbs, replaced fuel lines and filters, replaced the fork/fairing boots, verified good compression (142psi left and 147psi right), set the valve clearances, changed oil and filter, flushed front brake system, replaced the battery, and tuned the carb mixtures and balance. She’s a little rough cosmetically (paint faded, numerous paint chips in front-facing surfaces, left lower fairing has been broken and repaired, most of the gold pinstripes have worn off, and a curiously-placed dent in the rear of the fuel tank- ‘ouch!’), but she runs well and goes down the road very comfortably. Features include hard saddlebags that detach, adjustable windscreen, front disk brake (rear drum), single-sided swingarm with shaft drive, reliable, air-cooled opposed-twin engine. Caveats: i don’t have a key to the saddlebags, the voltmeter doesn’t work (shows 17V any time the key is on), tires are a pretty old, but with decent tread. A great classic commuter bike. Easy, inexpensive maintenance, great weather protection, comfortable, and easy to ride. 66K miles showing, believed to be accurate.
$2500 firm.

Filed Under: Uncategorized

SOLD: 1975 Yamaha RD 350 parts bike/project

April 28, 2020 by Jim Harriger

Sold on 5/3/2020

I got this RD350 from a customer as part of a 2-fer deal: take these two bikes, make 1 runner, keep the other one. So i fixed up his ’74, and kept this one. It’s nearly complete ( missing the oil pump, headlamp, and battery) and the engine has compression, turns over easily with the kickstarter, and all 6 gears engage. The tank was cleaned with rust remover about a year ago, and is solid, with a bit of surface rust. The lock has been removed from the cap, i have the lock unit. I also have a box of parts to go with this that includes an extra front brake caliper, most of a top-end gasket kit, the oil pump side cover, headlight ring and sealed beam (not functional), fuel petcock (disassembled), charging and ignition system parts removed from the ’74 to make way for electronic ignition. some turn signals, and the original front brake hose setup from the ’74. I have a clear and signed WA title, but no key.

As is, where is. you’ll need a trailer or pickup.

$750

Filed Under: Uncategorized

Vintage Motorcycle Festival

August 26, 2015 by Lara

On Saturday Aug 22nd, we rode down to Tacoma and spent the afternoon ogling vintage bikes at the LeMay Car Museum. Here are a few of the ones that really stood out for me.

Six Into One
Six Into One
I’ve always had a thing for 6-cylinder inline engines. The early-80’s Honda CBX was a lovely piece of work, and the 6-into-1 bundle-of-snakes header here is just the icing on the cake. The owner rode it away when the meet was over and it sounded as good as it looks.


Scrambler
Scrambler
One of the first bikes I really remember: a late 60’s Honda CL 350 Scrambler. A co-worker of my dad’s had one just about like this. He had to go to Germany for an extended period of time, so he left it with my dad. We used to go for Sunday afternoon rides up to around the lake just a few miles for our house. This is probably where my love of motorcycles was kindled.


Old Meets New
Old Meets New
I’ll be the first to admit that I’m not that big a fan of modern Moto Guzzi’s, but this ’57 Falcone (also known as the ‘bacon slicer’ Guzzi) really does it for me. The artistry in the design of the overhead cam rocker boxes, and that enormous external flywheel. Pure Italian beauty.


Trials!
Trials!
This is a ’76 Bultaco Sherpa T Observed Trials bike. I Had a ’79, which was nearly identical except that it was blue, and mine had a minor celebrity provenance. It’s first owner was a successful national motocross racer named Chuck Sun. That Bultaco was the bike that taught me enough trials skills to get to the Advanced class. (The first time around, in my early 20’s. I worked my way to Advanced standing again in my late 40’s; it was much harder that time!) This bike is awesome for two reasons: it still has the original alloy fenders, which almost none of them that have actually been used in competition still possessed, and it was shown with a period-correct punch card clipped to handlebars, as though its rider was just about to head out on the loop for a real event back in ’77.


We Have a Winner!
We Have a Winner!
This is the bike that took Best-in-Show. A Godet Egli-Vincent. Which means a 1000cc V-twin from a classic Vincent Black Shadow, in a Patrick Godet-built replica of an Egli chassis. Godet did such a masterful job of replicating the Egli chassis that Fritz Egli gave him permission to use his name on the bikes. An absolutely stunning piece of craftsmanship. It also made a beautiful noise!

There are more pictures at Lara’s SmugMug account.

Filed Under: Uncategorized

Bar Risers and Stainless Steel Hydraulic Lines on a V-Strom

May 11, 2015 by Jim Harriger

Recently, a customer brought me his 2014 Suzuki V-Strom DL1000 with what I thought was a simple request: he wanted to add a set of 2 inch adjustable ROX handlebar risers to the bike. I assured him that the project was eminently do-able and we set about figuring out what it would take to make it happen. A bit of messing around and measuring told me that there wasn’t enough slack in the throttle cables,  the brake , or the clutch hydraulic lines, to make the project a simple bolt-on job.

After the initial assessment, I determined that new throttle cables (two of them, it’s a push/pull setup,) a new hydraulic clutch line, and new hydraulic brake lines were needed. The wiring harness probably needing some re-routing, or maybe extending as well. I gave the client an estimate, and got approval to move forward. I got on the phone, and arranged to order the parts.

A quick call to Galfer USA and a discussion with the very knowledgeable folks and we agreed that replacing only a few of the brake lines in an integrated ABS system, like the V-Strom has, is a bad idea and can lead to inconsistent brake performance. Not what you want in a braking system. Their recommendation was that I purchase and install a complete stainless-steel kit, for optimum and consistent performance. The complete 6-line kit included the front brake upper, lower, and caliper cross-over, rear to abs, rear to caliper, and clutch lines. I contacted the client, explained this, and we agreed to proceed.

First I tackled  the clutch line. The fiddly bit here is that there is a clip holding the stock line to the inside of the frame spar, and the bolt is inserted from the inner side of the frame.

original clutch line retention bolt, V-Strom
The bolt in question is behind the frame here.

The trick is to use a short socket extension and a crows-foot wrench to loosen the bolt. With a bit of finger contortion the bolt and clip can be removed. When replacing the clip with the supplied clip for the new line, using a small dental mirror to allows you to line up the bolt. It is then tightened with the crows-foot wrench.

The next tricky part comes when installing the lines for the front brake. What complicates this is that the stock line was fixed to the frame near the steering head by means of a special block-type fitting, with a mounting hole. The connections on the Galfer stainless steel lines are a bit different, and use a clip-type mount, which puts the line in a slightly different position. Fortunately there is enough flexibility in the hard brake lines to accommodate this slight adjustment.

Then it’s time to install the new lines for the rear brake. These lines are behind the right side panel on the bike, behind the brake fluid reservoir for the rear brakes, and snake up to hard-lines which mate up to the ABS controller located just under the seat. You want to be careful here to not put too much torque on the hard-lines themselves, and make sure the routing is as nearly identical to the originals as you can make it. Loosen and then remove the hard lines from the ABS controller, this gives better access to the unions where these lines join the flexible lines. Then remove the flexible lines and replace with the Galfer lines. Last connect the hard-lines back up to the ABS controller

ABS controller and brake lines
Here’s what it looks like when it’s reassembled.

Now you’re ready to install the risers.

Once the risers are installed it’s time to tackle the wiring harness. With the bars up and back about 2 inches, the wiring harness is stretched too tight. Some experimentation showed that the left and right handlebars harnesses can be run behind the triple clamps as opposed to in front of them. This allows enough length for the full range of steering travel. To make sure the harnesses stayed out of the way of all the moving parts, I captured each one to the back edge of the triple-clamp with a wire-tie and hold down.

New routing of handle bar wiring harness
New wire routing for handlebar wiring harness

Once all the parts are installed it’s time to put new brake fluid in and bleed all the systems. You’ll want to have plenty of fluid on hand; you have many feet of line to fill and get bubbles out of. If you have access to a pressure-bleeder (i.e. one that pushes fluid into the master cylinder under mild pressure,) now is when it pays for itself! Assuming you don’t, I can offer the following tips.

Start slowly with the lever. You need to allow the brake fluid to flow from the reservoir area into the master cylinder. It’s a very tiny hole, and it takes time to get fluid through it. Keep at it;  after enough cycles of the lever, you’ll start to get some air/fluid out of the bleed nipple. Bleed all three systems (clutch, front brake, and back brake) this way until you are getting no more air out of the bleed nipples. If you have a firm pedal and levers, you’re done with bleeding.

In my case, the rear brake and clutch were great, but the front brake lever was still a little mushy. To remedy this, and to make sure the system has absolutely no leaks clamp the lever in the ‘pulled’ position with a woodworking clamp, or a strong rubber band. (For the back brake you can hang a full paint can from the pedal.) Leave it this way for 8-12 hours. When you come back you should find no brake fluid seepage at any banjo bolt or union fitting, and a much firmer lever. This works because air is compressible, and brake fluid isn’t. Holding pressure on the lever makes the bubbles in the fluid really tiny, and over the hours, they float up through the brake fluid and into the master cylinder, through that very tiny hole we talked about earlier, and up into the reservoir. Viola, no more air in the lines.

There you have it. It’s not trivial and it will take six or seven hours. But if you love the bike, and all it needs is a bit of fitting, it is doable. As a bonus, you get complete braided-stainless hydraulic systems!

handle bar rises and new lines installed
The finished project.

Filed Under: Outfit Tagged With: brakes, clutch, Risers, stainles steel lines, V-Strom

  • 1
  • 2
  • Next Page »
  • Restore
  • Outfit
  • Projects
  • Blog

© Copyright 2014-2018, MotoDuvall, LLC · All Rights Reserved